Let's Encrypt 试用手记

Let’s Encrypt 简介

Let’s Encrypt 是一个新的数字证书认证机构,它通过自动化的过程消除创建和安装证书的复杂性,为网站提供免费的 SSL/TLS 证书。Let’s Encrypt 项目获得了 Mozilla、思科、Akamai、IdenTrust 和 EFF 等组织的支持,由 Linux 基金会托管。它在 9 月中旬颁发了第一个证书,已经从 12 月 3 日起开放了 Beta 测试,它已经得了 IdenTrust 的交叉签名,这意味着其证书现在已经可以被所有主流的浏览器所信任。
你现在可以在此体验一下使用新的交叉签名的中级证书所签发证书的服务器。

letsencrypt-helloworld

获取 Let’s Encrypt 的 SSL 证书

更新: 这个脚本通过调用 acme_tiny.py 认证、获取、更新证书,无需以下步骤(感谢 xdtianyu)。

安装 letsencrypt 客户端

获取 Let’s Encrypt 客户端并执行,官网提供的安装方式如下:

1
2
3
git clone https://github.com/letsencrypt/letsencrypt
cd letsencrypt
./letsencrypt-auto --help

这些命令会自动安装所需依赖,安装完后会打印出 letsencrypt 的帮助信息,或者自动手动执行

1
/root/.local/share/letsencrypt/bin/letsencrypt --help

五种验证方式简介

之后就可以用 Let’s Encrypt 的客户端验证并签发证书了。
如果是在 Debian 下使用的 Apache,可以直接使用官方的插件来签发(并会自动配置?我环境既不是 Debian 用的也不是 Apache,没有试)

1
./letsencrypt-auto --apache

帮助信息中说有个--nginx选项,但是目前官方还没对应的 nginx 的插件提供,用这个的话会报错

1
2
3
4
$ ./letsencrypt-auto certonly --nginx -d haoyizebo.com -d www.haoyizebo.com
Updating letsencrypt and virtual environment dependencies.......
Running with virtualenv: /root/.local/share/letsencrypt/bin/letsencrypt certonly --nginx -d haoyizebo.com -d www.haoyizebo.com
The requested nginx plugin does not appear to be installed

除了以上两种,还有三种方式来验证并签发证书:

  • standalone
  • webroot
  • manual

这里先试一下最方便的 standalone 的方式(个人博客可以这么搞,生产可不能用这个搞,这里也就试试看):

1
$ ./letsencrypt-auto certonly --standalone -d haoyizebo.com -d www.haoyizebo.com

输入 email(文档上说 email 是用来找回证书的,没有试过)
letsencrypt-email

同意就行了
letsencrypt-agree

提示我 80 端口已经被 nginx 占用了
letsencrypt-port

选 OK 并退出 TUI 后提示如下:

1
2
3
4
5
6
7
8
9
10
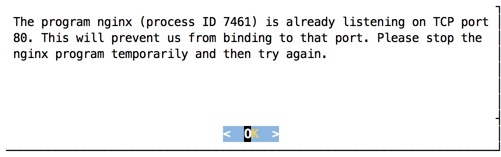
At least one of the (possibly) required ports is already taken.

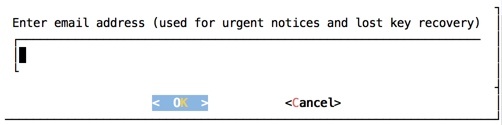
IMPORTANT NOTES:
- If you lose your account credentials, you can recover through
e-mails sent to your@email.com.
- Your account credentials have been saved in your Let's Encrypt
configuration directory at /etc/letsencrypt. You should make a
secure backup of this folder now. This configuration directory will
also contain certificates and private keys obtained by Let's
Encrypt so making regular backups of this folder is ideal.

用 standalone 的方式,它会自己开一个 SimpleHTTPServer 并占用 80 端口做验证,需要先把服务停一下,如果你不介意短暂的暂停你的服务,这种方式当然是最方便最快的。

使用 Webroot 的方式验证

不过相信大家还是不希望为了签发证书而中断服务的。这就要用 webroot 或 manual 的方式了。我用的 nginx,也懒得自己造文件了,这里使用 webroot 的方式来验证并签发(manual 的方式和 webroot 的相似,需要自己建一个 json 文件放在 web 服务器下做验证)。

首先在 nginx 的 80 端口的服务中配置上

1
2
3
location /.well-known {
alias /srv/http/letsencrypt/.well-known;
}

然后运行以下命令:

1
./letsencrypt-auto certonly --webroot -w /srv/http/letsencrypt -d haoyizebo.com -d www.haoyizebo.com

注意!
对于使用 DNSPod 的用户(比如像我 ಥ_ಥ),此时会看到类似下边的报错。这个目前貌似无解,只能弃用 DNSPod。https://github.com/letsencrypt/letsencrypt/issues/1610
2015-12-25 更新:DNSPod 貌似好了,详见这里的 26 楼。因为 letsencrypt 的验证规则一直在调整,所以如果 timeout 什么的就多尝试几次吧。

1
2
3
4
5
6
7
8
Failed authorization procedure. www.haoyizebo.com (http-01): urn:acme:error:connection :: The server could not connect to the client for DV :: DNS query timed out

IMPORTANT NOTES:
- The following 'urn:acme:error:connection' errors were reported by
the server:

Domains: www.haoyizebo.com
Error: The server could not connect to the client for DV

我目前已切换至万网,等待 DNS 解析生效 ing…

一个小时过去了,再试

1
2
3
4
5
6
7
8
9
IMPORTANT NOTES:
- Congratulations! Your certificate and chain have been saved at
/etc/letsencrypt/live/haoyizebo.com/fullchain.pem. Your cert will
expire on 2016-03-07. To obtain a new version of the certificate in
the future, simply run Let's Encrypt again.
- If like Let's Encrypt, please consider supporting our work by:

Donating to ISRG / Let's Encrypt: https://letsencrypt.org/donate
Donating to EFF: https://eff.org/donate-le
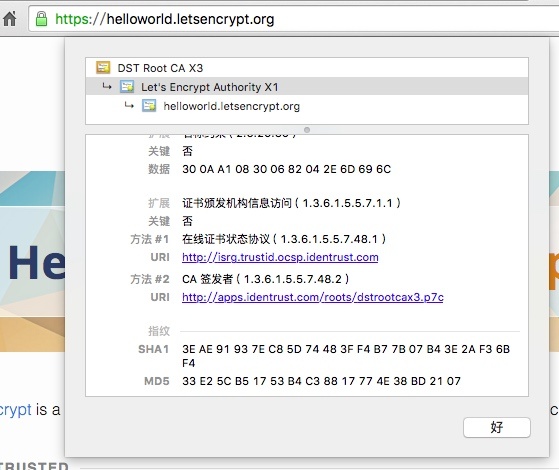
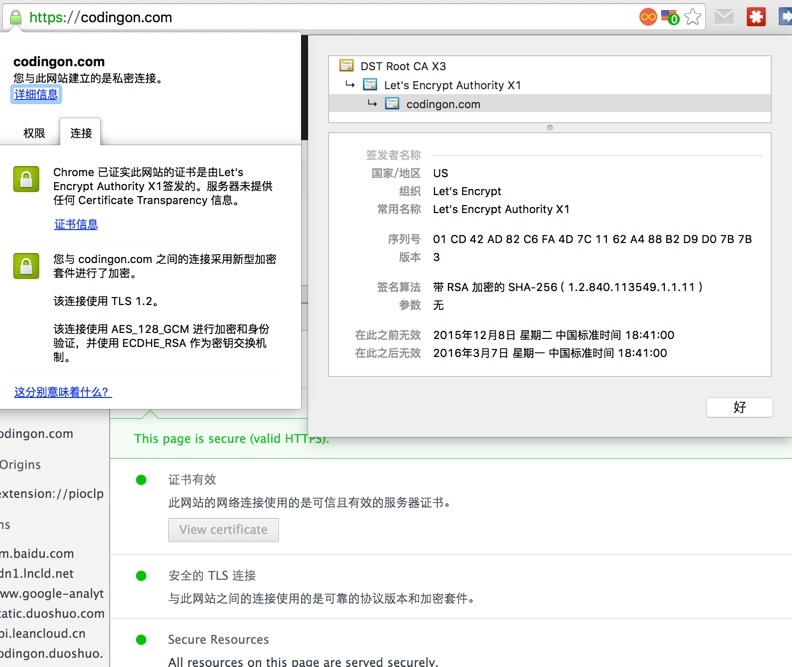
看到这个就说明证书已经签发成功了。

Let’s Encrypt 将认证的信息保存于/etc/letsencrypt目录

1
2
3
4
5
6
$ ll /etc/letsencrypt/live/haoyizebo.com/
total 0
lrwxrwxrwx 1 root root 36 Dec 8 19:41 cert.pem -> ../../archive/haoyizebo.com/cert1.pem
lrwxrwxrwx 1 root root 37 Dec 8 19:41 chain.pem -> ../../archive/haoyizebo.com/chain1.pem
lrwxrwxrwx 1 root root 41 Dec 8 19:41 fullchain.pem -> ../../archive/haoyizebo.com/fullchain1.pem
lrwxrwxrwx 1 root root 39 Dec 8 19:41 privkey.pem -> ../../archive/haoyizebo.com/privkey1.pem

然后,在 nginx 的配置文件中将下面两行设置成 Let’s Encrypt 的实际路径即可:

1
2
ssl_certificate /etc/letsencrypt/live/linuxtoy.org/fullchain.pem;
ssl_certificate_key /etc/letsencrypt/live/linuxtoy.org/privkey.pem;

附图一张:
letsencrypt-result

值得注意的是,目前 Let’s Encrypt 的证书有效期为 90 天(应该是因为目前还在测试阶段,正式之后应该是 1 年),之后需要手动续期。另外,在请求证书认证时会有频率限制。总的来说,证书的认证过程还是非常容易的,而且又是免费,所以对此有需要的朋友不妨一试。

官方目前建议通过 Let’s Encrypt 的配置配合 crontab 来实现自动续期,可以参考:https://community.letsencrypt.org/t/maximum-and-minimum-certificate-lifetimes/264

Reference

https://letsencrypt.org/
https://linuxtoy.org/archives/lets-encrypt.html
http://v2ex.com/t/233860
https://github.com/letsencrypt/letsencrypt/issues/1610
https://community.letsencrypt.org/t/maximum-and-minimum-certificate-lifetimes/264


Let's Encrypt 试用手记
https://www.haoyizebo.com/posts/3649c3a0/
作者
一博
发布于
2016年2月3日
许可协议